Add Google Analytics Tracking Code Into Prestashop 1.6.1.7

Hi there, you’re reading on Prestashop again šŸ™‚

Somehow I can’t find any modules to insert Google Analytics (GA) tracking code into the Prestashop 1.6.1.7 default template.

I had to ssh in and change the footer.tpl file. It is located at:

/var/www/html/themes/default-bootstrap/footer.tpl

Open that file and place the GA tracking code just before </body> close tag.

And you will run into problem straight away. Now you will find that your side not loaded at all and in fact returning 500 server error.

Unless you change another codes, most likely the culprit it the GA tracking code that you just added.

Because Prestashop isĀ using Smarty template engine, what happen is that Smarty try to parse the GA tracking code. Now you just need to add another two (2) extra line.

{literal} and {/literal}

Your end code should look like something like this:

{literal}
(function(i,s,o,g,r,a,m){i[‘GoogleAnalyticsObject’]=r;i[r]=i[r]||function(…
ga(‘create’, ‘UA-XXXXXXXX-X’, ‘auto’);
ga(‘send’, ‘pageview’);
{/literal}

Reload the page, and it will show up correctly. Also you will notice the GA tracking is now function properly.

Till another time.

Prestashop 1.6 Admin Panel very slow

It was very frustrated when you’ve configured everything but your Prestashop 1.6 still behave like it got stuck somewhere. For me it was the loading was very slow even when I did delete all predefined users and products.

First you got to ssh (or ftp, or via cpanel, whichever suits you) and go to this directory:

/var/www/html/config

(Note: This is assuming you extract/unzip the files in /var/www/html directory. Obviously you need to go to your exact directory, don’t just follow here blindly)

And fired up your favourite text editor, for me it is nano.

sudo nano defines.inc.php

And hit up command to search

Ctrl + W

And put in this text, and Enter.

DEBUG_PROFILING

And change the false value to true. (And save it via Ctrl + X) And Walla! When you reload the pages it will show you more of the things happen when the page loading. For me it was initContent take around 11 second to complete. Very slow, and their debug message also will mock you to run your server on a toaster.

Ok. If your debug message also point you to almost the same issues as what I’ve face, then it might be the same solutions.

I spend around 1 day+ googling for the solutions but no avail. Most of it pointed to some codes, but it was very old and already fixes in version 1.6.

Until few minutes ago i found this thread:Ā 431450-load-time-15781-ms-youd-better-run-your-shop-on-a-toaster

That the one that pointed me to where I fixes it.

(Note: In that thread it was because of his firewall blocking the connection, not my issues)

For my side, it was the directory /var/www/html/config/xml was not assign to www-data user. So all I had to do was:

sudo chown -R www-data:www-data /var/www/html/config/xml/

And reload page, still slow but it cut back form 11 second to 6 second.

Reload again, now it become 400ms. Very fast.

So check the directory permission and owner too. This simple things could make your page load very slow.

(Note: During the installation I did give the correct permission and set the correct owner to all in the listed issues, but somehow this xml directory was not shown in one of the list back then)

Start developing Github project from Codeanywhere

We’re using Codeanywhere.com most of the time. It is easy and the user interface is what we’re familiar with. So it works well for us. You mileage may vary.

So now, you might already know, we have one open source project recently which is CUTIeSys. Fancy names! Yes we know.

Now this is a guide for anyone reading to quickly want to start doing some development/customisation or just simple want a preview of the web system (mostly apply to all web system/scripts that you can pull from github) like our CUTIeSys. (And you don’t want a hassle to setup on your local VM like what our guide last time).

So quickly go to Codeanywhere, register an account (its free!) and login to your editor. We start from there.

Click File > New Project to create new project.

Screen Shot 2016-07-20 at 12.48.22 PM.png

We put in the name as cutiesys2 (you can actually put anything you want) and click OK.

Screen Shot 2016-07-20 at 12.48.43 PM.png

Click Git from URL, and put in the url of CUTIeSys github url (https://github.com/maelzx/cutiesys) and click NEXT.

Screen Shot 2016-07-20 at 12.49.10 PM

Put in the name again, we choose to follow the same (cutiesys2) and from the list scroll down and select PHP Development Stack with Apache, PHP, MySQL …. on Ubuntu 14.04 (or Centos 6.5, your preferences), and click CREATE.

Screen Shot 2016-07-20 at 12.49.37 PM.png

And… Wait begin. Took around 5 min or so.

Screen Shot 2016-07-20 at 12.49.47 PM.png

After the process complete, you right click on the project name and click on Info.

Screen Shot 2016-07-20 at 12.50.40 PM.png

Then you will view the info, just copy the preview url.

Screen Shot 2016-07-20 at 12.50.59 PM.png

Then you open up the file under application > config > config.php, we need to change the base_url value.

Screen Shot 2016-07-20 at 12.51.24 PM.png

change to (and don’t forget to save the file)

Screen Shot 2016-07-20 at 12.51.35 PM

Then from the info tab, you copy down the phpmyadmin url, open in browser and login as root (without password) and create a new database. Here we create new database as cutiesys2.

Screen Shot 2016-07-20 at 12.52.14 PM

After you create, go to the database and select SQL tab.

Screen Shot 2016-07-20 at 12.52.32 PM.png

Then you open up the file cutiesys.sql as below. Select all and copy the content of the file.

Screen Shot 2016-07-20 at 12.52.55 PM

And paste it in the phpmyadmin page just now and run it.

Screen Shot 2016-07-20 at 12.53.17 PM.png

When done, it will create the table and you now have one user inside the user table.

Screen Shot 2016-07-20 at 12.53.44 PM.png

Now you go back to your Codeanywhere screen and open up file application > config > database.php and edit to put in the the mysql username, password and database name. As per what we mention above, user is root, no password and database as what we created which is cutiesys2. And save the file.

Screen Shot 2016-07-20 at 12.54.14 PM.png

Now when you open up the preview url (refer info contact back), you should see the login page of CUTIeSys. Very cute isn’t it?

Screen Shot 2016-07-20 at 12.54.51 PM.png

Now you just need to login as:

username: admin
password: password

And you may see the system already. Neat!

Screen Shot 2016-07-20 at 12.55.09 PM.png

Now you how to quickly do a preview or development of any github project (limited to what Codeanywhere supports). Don’t forget to support us!

Setup Sentora On Your Local VM

[Edited] – It has come to our knowledge that Sentora is not safe to use in production for now, but you may still use to manage your local server (strictly no internet connection), we face a syn-flood originating from our digital ocean droplet that is installed with Sentora.

We’ve stumble upon Sentora from a request by one of our client. It was for a simple addition of custom packages for Sentastico (a Fantastico alike for Sentora).

What is Sentora? It is a CPanel alike to manage your server, domain, user, reseller etc. It as an Open Source and freely available for you to install and use.

Now this is just a simple guide we wrote down to have this install on our local VM for our reference (and now you too).

What we have:

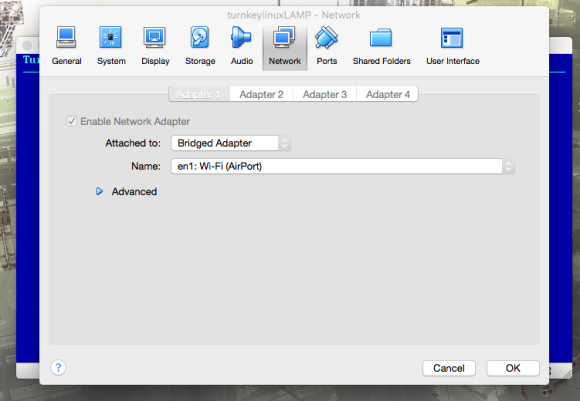
  1. VirtualBox installed. (version 5.0.24 but you may use latest version)
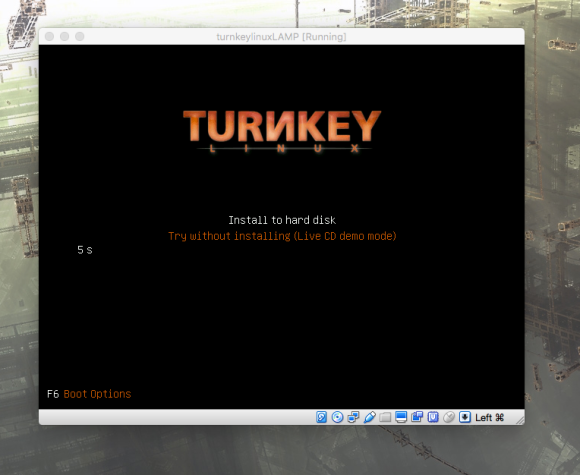
  2. Ubuntu 14.04.4 LTS installed as Guest in Virtualbox. (Only install OpenSSH server during installation option, so that you can access via ssh/putty)

Now if you go to Sentora web atĀ www.sentora.orgĀ and then you need to head to the installation documentation pageĀ here. (if you want follow their instruction)

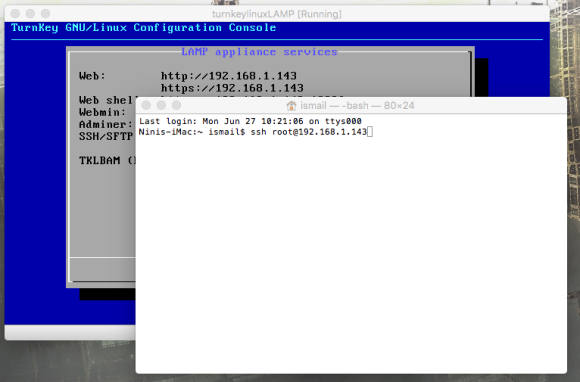
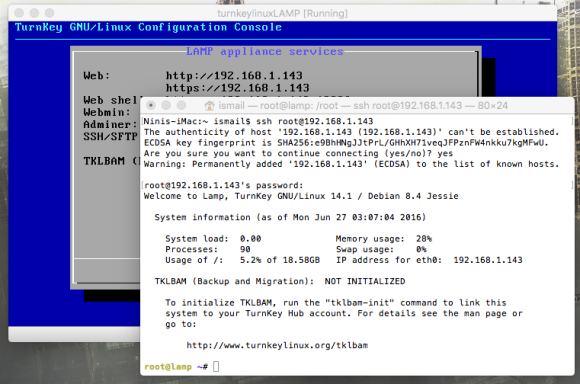
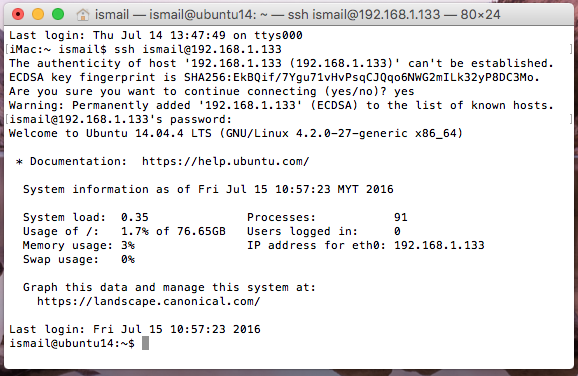
First step, ssh into your Ubuntu VM:

Sample command: ssh ismail@192.168.1.133

Screen Shot 2016-07-15 at 11.41.26 AM

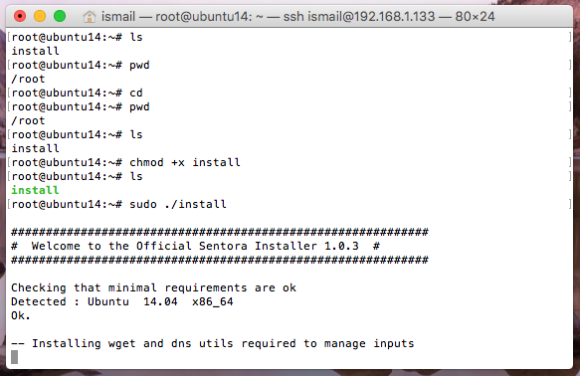
Then you run this command at the console:

sudo -i
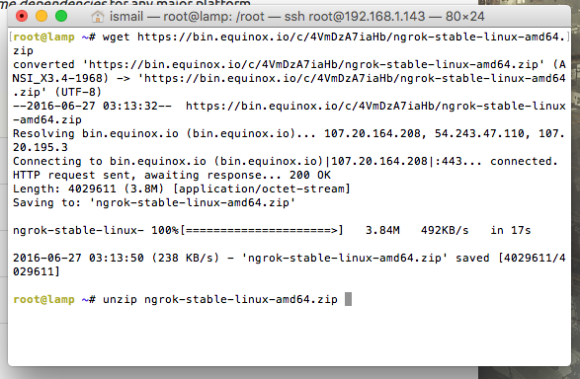
wget sentora.org/install
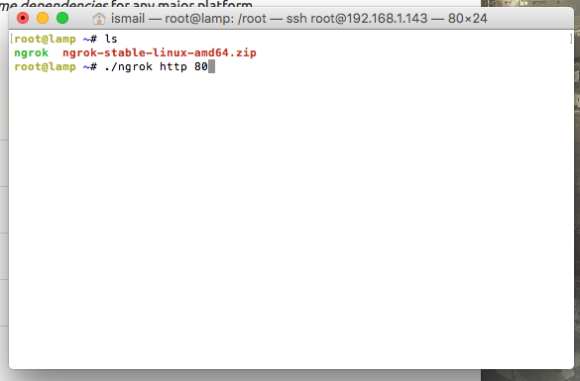
chmod +x install
sudo ./install

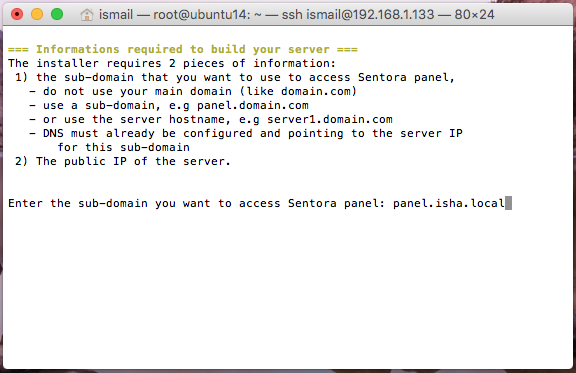
Then the installation will start. Follow the instruction as below:

Screen Shot 2016-07-15 at 11.53.21 AM

Select the area/timezone that you’re in:

Screen Shot 2016-07-15 at 11.54.11 AM.png

Put in the subdomain for Sentora. Here you can put any subdomain you want, we will just update our local host file to point to the local ip address of the VM. For example here we will use subdomain panel.isha.local.

Screen Shot 2016-07-15 at 11.57.42 AM.png

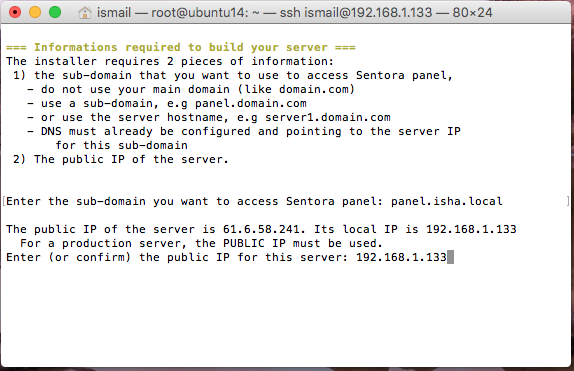
And update to put back your local ip address.

Screen Shot 2016-07-15 at 11.59.14 AM.png

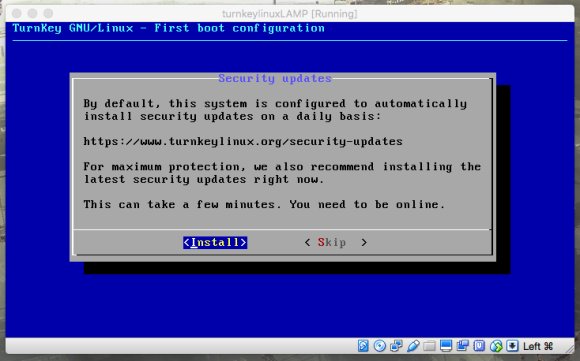
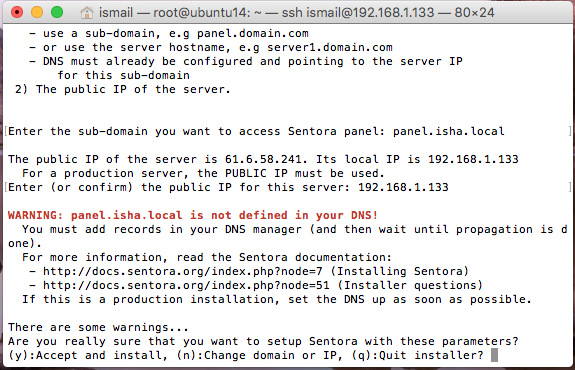
And accept and install when warning appears.

Screen Shot 2016-07-15 at 11.59.46 AM.png

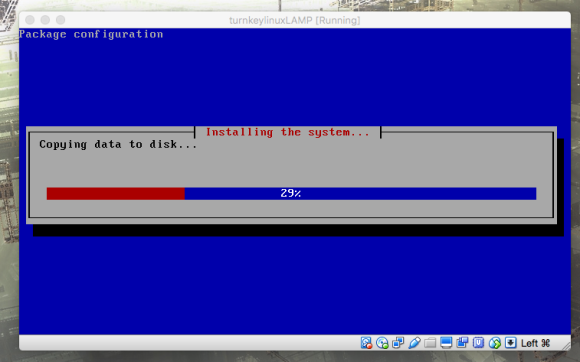
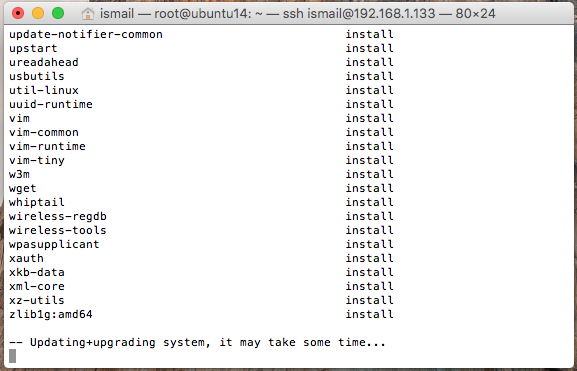
Then the installation will continue for some time, sit back and relax.

Screen Shot 2016-07-15 at 12.00.58 PM.png

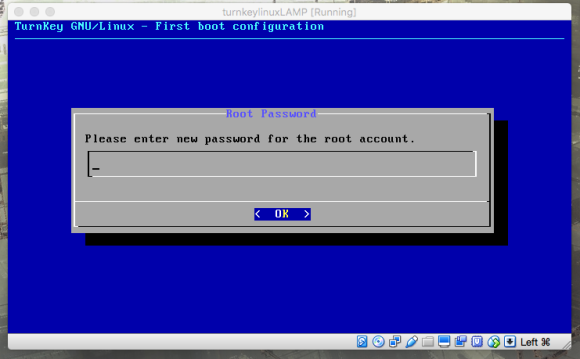
When all is completed, you will get to this stage. Then just put y to restart the server.
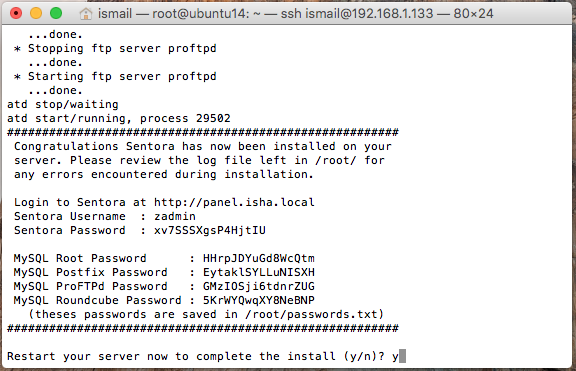
Screen Shot 2016-07-15 at 12.11.04 PM.png

As stated there,Ā you might want to note down the username and password to access the panel later.

One more task to do now while server reboot itself is to set the host file. Set the subdomain and domain name that we created just now for Sentora (panel.isha.local & isha.local) in our hosts file to point to the server local ip address. It should look like something like this:

192.168.1.133 Ā  Ā panel.isha.local
192.168.1.133 Ā  Ā isha.local

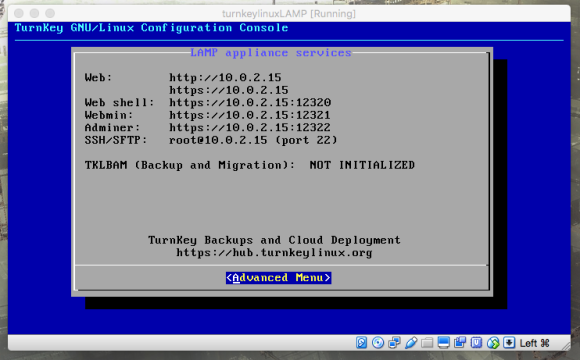
After that to confirm that it’s working fine, try to ping the domain and you should receive a feedback if it is working correctly.

Screen Shot 2016-07-15 at 3.15.38 PM.png

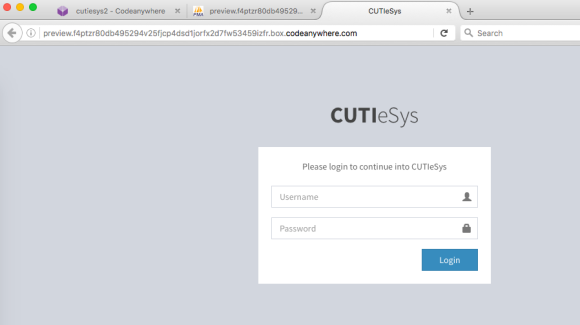
Open up the url/subdomain in your browser, you should be able to see the Sentora login panel.

Screen Shot 2016-07-15 at 3.17.36 PM

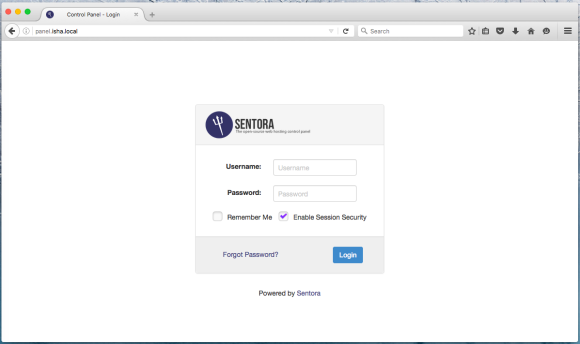
You may login using the password that is displayed earlier (or you can still access the file and view the password to login)

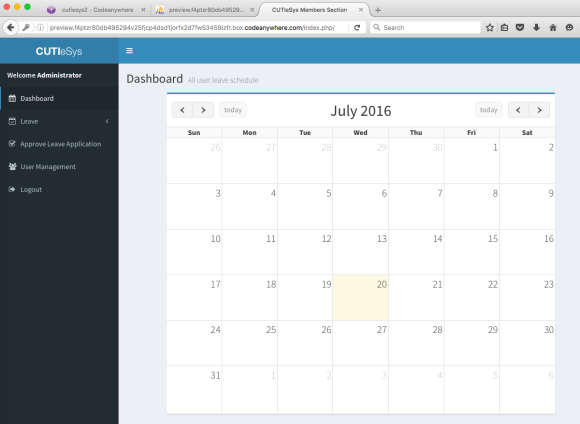
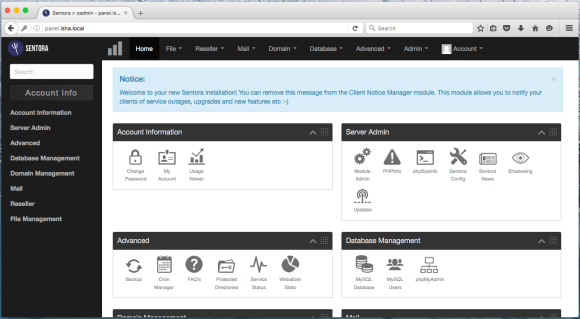
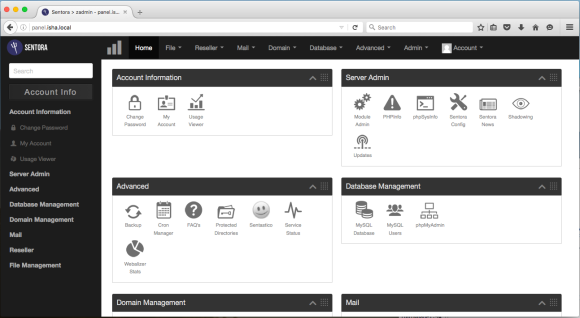
After you manage to login, welcome to the Sentora control panel.

Screen Shot 2016-07-15 at 3.22.07 PM.png

Next we will proceed to install Sentastico. Refer the guide from developerĀ here

You ssh to the server and run command ‘sudo -i’ to get into root. Then run this command:

zppy repo add zppy-repo.mach-hosting.com/repo
zppy update
zppy install sentastico

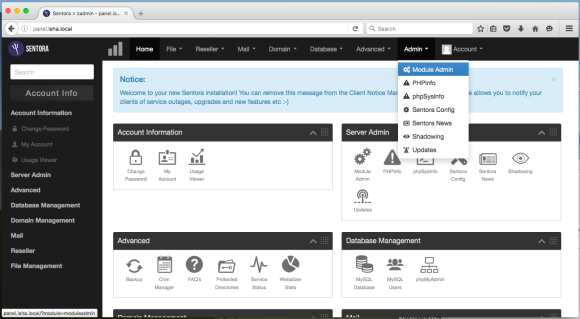
Then after you run the command, go to the Sentora web panel and go to Admin > Module Admin

Screen Shot 2016-07-15 at 3.30.40 PM.png

In the Module admin page, scroll down until you saw Sentastico in the list and tick where you want it to appear. I tick it all three.

Screen Shot 2016-07-15 at 3.31.16 PM.png

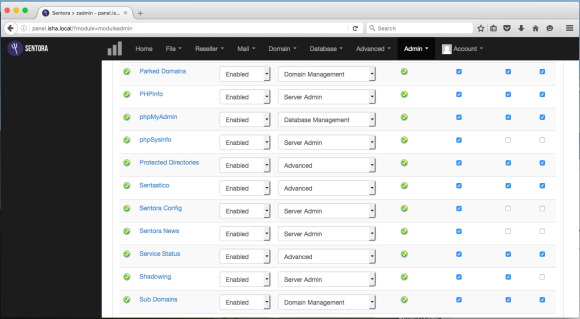
Don’t forget to save changes (scroll down until you saw the button).

Now when you go back to the Home page, you will notice that Sentastico icon is now shown. Click it.

Screen Shot 2016-07-15 at 3.35.23 PM.png

First you need to Add the package, in this example I add in wordpress. Click the add button on wordpress row.

Screen Shot 2016-07-15 at 3.36.42 PM.png

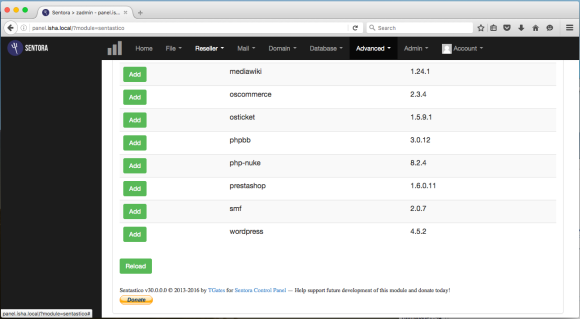
After you click add, wait for awhile and the list will refresh. It will no longer shown in the list for the package that you’ve added.

From there you go to Domain > Domains

Screen Shot 2016-07-15 at 3.38.37 PM.png

Then I will be creating my main website which is isha.local.

Screen Shot 2016-07-15 at 3.39.55 PM.png

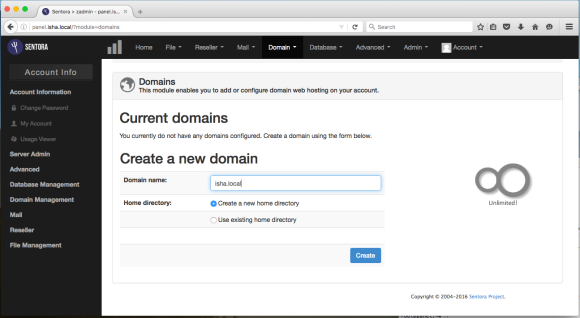
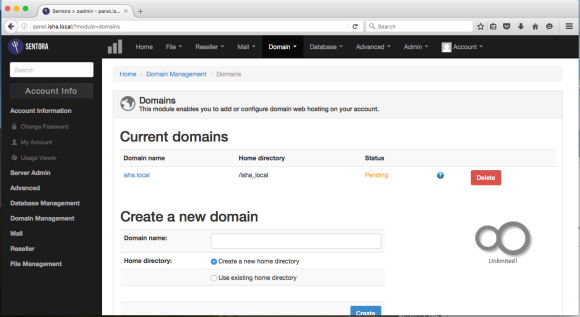
After clicking Create button it will show you this after done loading.

Screen Shot 2016-07-15 at 3.41.16 PM.png

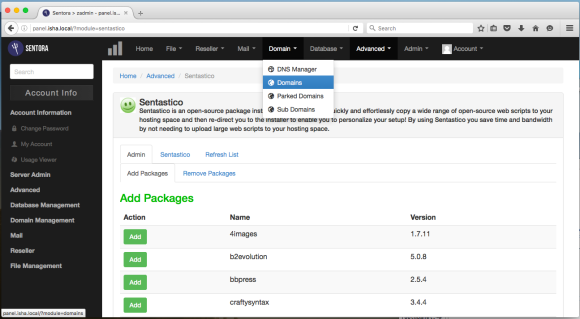
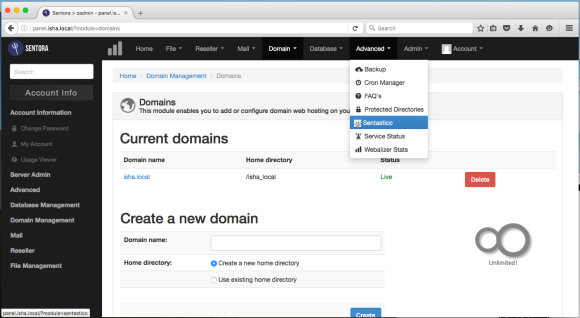
Then from there go to Advanced > Sentastico

Screen Shot 2016-07-15 at 3.53.06 PM.png

Then open up the second tab in Sentastico page, to view this list (packages that is available to install)

Screen Shot 2016-07-15 at 3.54.16 PM.png

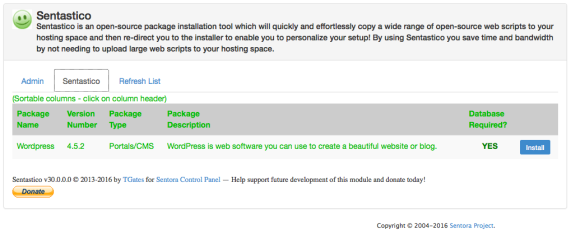
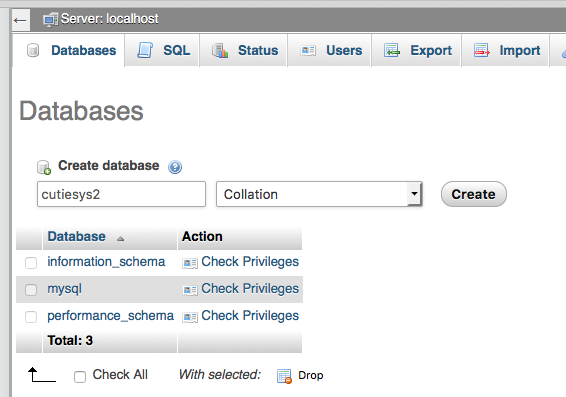
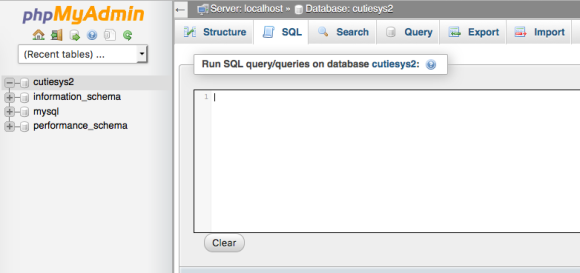
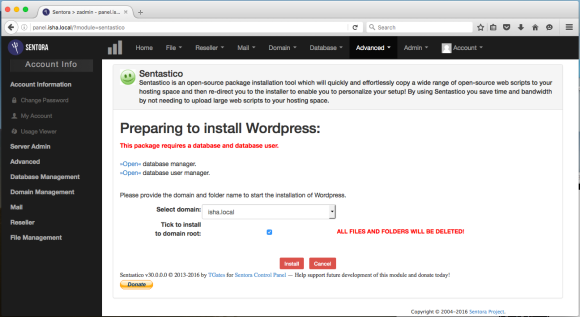
You click the install button. The proceed with this setting page. Tick to install in the domain root (so it will in isha.local domain itself). Don’t forget to click on the link to create database & database user (also note down the database name, database username & database password).

Screen Shot 2016-07-15 at 3.55.55 PM.png

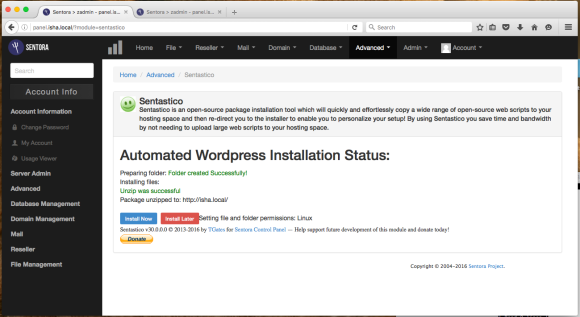
When done with database & database user creation, click install button and wait.

It will show you that the install process is completed (actually it is just half way complete). Click Install now button to continue with wordpress installation.

Screen Shot 2016-07-15 at 4.00.09 PM.png

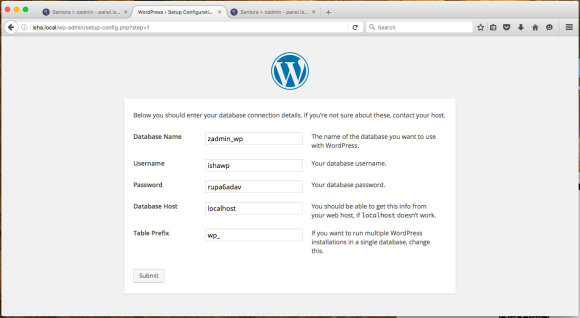
You proceed with WordPress installation.

Screen Shot 2016-07-15 at 4.02.43 PM.png

Screen Shot 2016-07-15 at 4.03.34 PM.png

Screen Shot 2016-07-15 at 4.03.43 PM.png

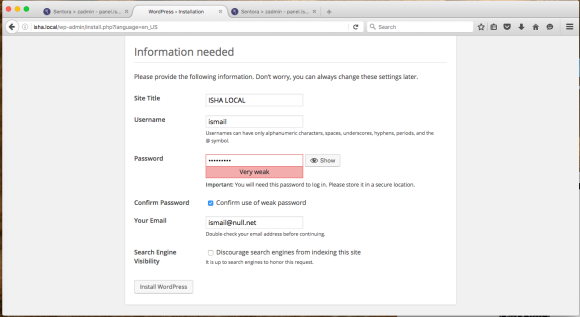
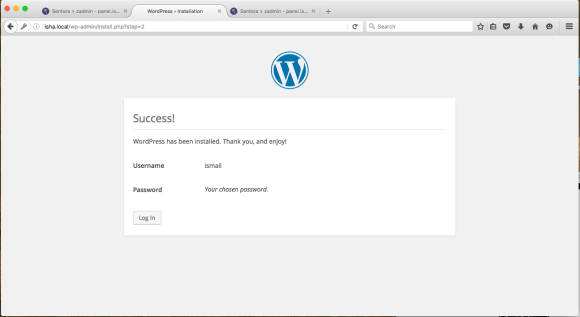
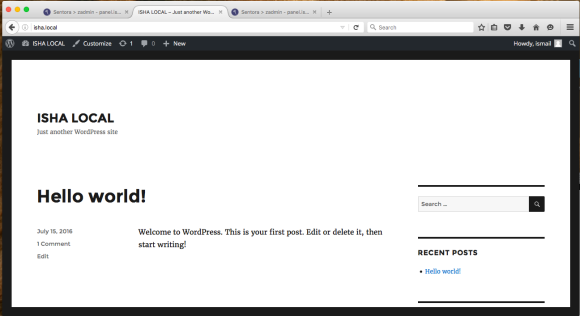
And done! You have wordpress in your local domain. Congratulations!

Screen Shot 2016-07-15 at 4.04.12 PM.png

Now you have knowledge of installing Sentora, Sentastico & basic usage of it. Go do some good works.

And don’t forget that you read this from here, if you need any help please don’t hesitate to contact us. If you need an installation service, we do provide it. Please contact us!

Bawa localhost anda ke mata dunia

[Note: This article is in Malay language, we will have English version soon]

Menjadi kebiasaan untuk web developer buat semua development dekat localhost. Termasuklah saya sendiri. Tak salah pun. Ikut kemahuan dan kemampuan masing – masing.

Salah satu isu yang selalu jugak kita hadap bila buat kat localhost ni… Susah nak tunjuk kat user lain. Contoh kita develop pakai desktop, nak tunjuk kat bos/client takkan nak usung desktop. Ye, boleh akses guna local network. Tapi kalau bos/client tak ada dekat opis, camna?

Barulah kita terpikir, kenapa tak buat development kat server je. So senang orang nak akses. Tapi… Isu lain pulak contohnya kalau kita tak ada full access ke server tu, nak ubah itu ini susah. Kalau ada full access pun, perlu ambik kira kena upload/download (or terkini sikit, commit, push & deploy) so akan melambatkan sikit proses development.

Jadi, kita guna lah localhost yang diorang boleh akses dari luar?

Eh? Boleh ke?

Mestilah boleh! Asalkan localhost tu ada akses internet lah.

Bagaimana?

Ok, ini kami terangkan secara ringkas.

Kami gunakan servis ngrok. Nama tak cantik pun kan. Silap type, boleh jadi ngok!

[Nota: Ada beberapa lagi servis yang seakan – akan sama, kami akan tulis dalam artikel yang akan datang, tunggu!]

Secara asasnya, kami gunakan Virtual Machine (VM) untuk developmen environment. Anda pun patut gunakan VM dalam kerja – kerja development. Memang mula – mula akan nampak macam susah nak setup, tapi ada beberapa cara yang mudah untuk start.


Pertama: Install Virtualbox

(boleh download dari sini:Ā https://www.virtualbox.org)

Screen Shot 2016-06-27 at 10.30.33 AM

[Nota: Proses install kami tak cover, kalau nak servis install boleh contact kami, ada caj]


Kedua: Download iso dari Turnkey Linux

(kami pilih LAMP Stack:Ā https://www.turnkeylinux.org/lampstack)

Screen Shot 2016-06-27 at 10.13.05 AM


Ketiga: Start install Turnkey Linux LAMP Stack

(ada step yang kami skip, tak penting pun)

Setup virtualbox, buat Machine baru, lepastu masukkan iso yang download tadi ke virtual drive Machine tu (mount iso to virtual drive).

Dan start Machine tu.

Screen Shot 2016-06-27 at 10.40.39 AM

Teruskan dengan proses install

Screen Shot 2016-06-27 at 10.41.19 AM

Masukkan password untuk root dan jugak MySQL (tak ada screenshot, lebih kurang dengan yang bawah ni)

Screen Shot 2016-06-27 at 10.44.02 AM.png

Mungkin ada beberapa step yang kami dah skip. Tapi selalunya anda boleh pilih next aje. Ni bila sampai kat bawah ni, maksudnya dah habis install. Boleh pilih untuk update kalau berminat. Proses update (untuk kami) ambil masa lebih kurang 10 minit.

Screen Shot 2016-06-27 at 10.44.50 AM

Lepas tu dia akan restart. Dan mungkin jugak time restart dia stuck. Jangan risau, reset je Machine tu dari Virtualbox. Lepas dia start balik, anda akan nampak screen macam ni.

Screen Shot 2016-06-27 at 10.46.36 AM.png

Jadi dah selesailah setup Turnkey Linux Lamp Stack kita. Dah boleh akses server VM guna IP yang dia tunjuk kat screen. Dan… Nampaknya tak boleh akses, hahaha.

Kita ubah sikit setting network dia, no worries. Tengok screenshot atas, nampak tak icon kat bahagian bawah kanan? Ok klik icon no 3 dari kiri, icon network tu. Klik dan pilih “Network Settings…”.

Ubah seperti screenshot di bawah.

Screen Shot 2016-06-27 at 10.58.10 AM.png

[Nota: Kalau laptop/desktop anda pakai wifi, pilih wifi, kalau pakai wired lan kabel, pilih network ethernet, ikut network mana satu yang connected ke internet]

Lepas tu kat screen utama dia yang tunjuk IP address tu, pilih Advanced Menu (hint: pakai keyboard arrow tu). Dan enter.

Screen Shot 2016-06-27 at 11.01.37 AM.png

Enter lagi sekali.

Screen Shot 2016-06-27 at 11.01.48 AM.png

Dan, Enter lagi sekali.

Screen Shot 2016-06-27 at 11.02.06 AM

Dan… Tadaa! Dah dapat IP baru daripada router anda. Kalini kita try lagi sekali browse ke ip tu guna browser kita.

Screen Shot 2016-06-27 at 11.04.29 AM.png

Dan loading dengan berjayanya!


Keempat: SSH ke server.

Kita kena akses ke dalam server tu untuk run ngrok. Kami pilih untuk akses guna ssh.

Launch terminal baru dan ssh ke server guna command:

ssh root@192.168.1.143

Screen Shot 2016-06-27 at 11.06.52 AM.png

Enter dan masukkan password, dan kita pun berjaya berhubung dengan server yang baru kita setup. Yeay!

Screen Shot 2016-06-27 at 11.07.13 AM.png

Amacam setakat ni? Masih ok? Ada muntah hijau dak?


Kelima: Setup Ngrok!

Download ngrok, yeay! Kat link niĀ https://ngrok.com/download

Screen Shot 2016-06-27 at 11.10.45 AM.png

Kita copy link download tu (Linux 64-Bit punya link) dan download kat server guna wget.

Screen Shot 2016-06-27 at 11.12.42 AM

Lepas tu unzip file yang baru download tadi.

Screen Shot 2016-06-27 at 11.14.45 AM.png

Dan terus kita run ngrok tu. Tengok apa jadi.

Command: ./ngok http 80

Screen Shot 2016-06-27 at 11.16.16 AM.png

Dah dapat url dah macam kat bawah.

Screen Shot 2016-06-27 at 11.17.05 AM.png

Bila browse dari browser guna address tu, apa jadi?

Screen Shot 2016-06-27 at 11.17.49 AM.png

Yeay! dah boleh browse local development server (VM kita tu la) daripada internet. Hebat tak ?

Tagged , , , , ,

Node.js for isha.my webpage up and running (part 2)

Now that you have NodeJS running happily in your local computer, we will go through the next step. We plan to get you familiar with NodeJS development on localhost.

We will skip few things, straight away jump into running a NodeJS local webserver.

As usual, the most important thing to do is…. Run a “Hello World” page on NodeJS.

What you will need:

  1. Text editor (notepad works fine, notepad++, sublimetext etc recommended)
  2. Me, as your guide. LOL

Create one folder for your test development. For ease of use, we create one at:

C:\nodejs

Inside that folder we create one file name:

server.js

Inside the server.js file we write this codes:

var http = require('http');

const PORT=8080; 

function helloWorld(req, res){
    res.end('Hello World');
}

var server = http.createServer(helloWorld);

server.listen(PORT, function(){
    console.log("Server listening on: http://localhost:%s", PORT);
});

ref: http://blog.modulus.io/build-your-first-http-server-in-nodejs

After that you run your command prompt and browse to the folder location. Inside the folder you simply run node command.

node server.js

And yippie! You have NodeJS server running and serving you the Hello World. Open your browser and copy paste the url from command prompt and run it.

nodejs-002

And you will see that your Hello World is served!

nodejs-003

You’ve made it this far! End of Part 2. See you in part 3.

  • Part 1
  • Part 2 (You’re here)
Tagged ,

Node.js for isha.my webpage up and running (part 1)

Introduction

The main webpage for isha.my is all running with Node.js. It is a very simple one page Node.js webpage. And it should be your starting point learning to develop with Node.js. We believe this will be a good starting point to get your feet wet, before jump over to code in Node.js.

Disclaimer

We use all the latest code from our main site as we wrote this. Any update to the code after that might not reflect in this article. Any code you take from this article might or might not work with your local or production environment. Any links we put into the article might not be the updated links. Any info mention here might not updated when you read this. Please, do contact us if you spot any issues with the articles. However we might or might not update the articles. Enjoy while you still can, winter is coming. For the night is long and full of terror.

We assume you use Windows based. So all screenshot and guide will be targeted for Windows based user. Only production we will target for Linux based server (Debian OS). If you want Mac based user targeted articles, please sponsor us a Macbook šŸ™‚

Get your Node.js installer

First open up your browser and point it to Node.js Website.

Node.js website

And click the big green INSTALL button. Follow through the installer and you should end up able to run “node” command in command line.

Open up your command prompt (Start button -> Run -> type in “cmd” & press Enter) and run this command:

node -v

You will get similar result as this:

node-command-prompt

Congratulations, you’ve finish the installation of nodejs & this tutorial Part 1.

  • Part 1 (You’re here)
  • Part 2
Tagged , ,

Tahun bermula

Dengan lafaz Bismillah Maha Suci ALLAH, kamiĀ mulakan post pertama blog untuk ISHA IT Solutions ini. Moga tahun – tahun akan datang akan bertambah posting – posting berilmu dari pihak kami.

Tahun 2015 ini mulanya tergerak hari kami untuk membesarkan pasaran perniagaan kami. Apatah lagi selepas April 2015 dengan perlaksanaan GST, ramai terkesan akibatnya. Kami juga begitu. Inilah inisiatif pihak kami untuk menjana pendapatan tambahan. Mungkin juga suatu hari nanti bakal menjadi pesaing hebat di dalam pasaran. Doa – doakanlah.

Kami menawarkan khidmat merekabentuk dan mentadbir halaman web. Khususnya laman web untuk perniagaan anda. Tuan – tuan dan puan – puan boleh lihat sendiri, di dalam menembusi pasaran dunia perniagaan Global pada hari ini, halaman web merupakan suatu keperluan.

Perlunya pihak tuan puan sebagai pemilik bisnes untuk menunjukkan bahawa anda mempunyai nama yang wujud di alam internet. Ini memudahkan pihak pelanggan tuan puan untuk melakukan carian ringkas, sekiranya mereka ingin mengambil tahu akan hal lebih lanjut mengenai produk mahupun bisnes tuan puan.

Tuan puan bayangkan. Jika nama bisnes tuan puan adalah “Keropok Madu Ali”. Mungkin agak heboh diperkatakan di kawasan sekitar kawasan perniagaan tuan puan. Tetapi jika tuan puan keluar sedikit dari kawasan tersebut, sebut nama “Keropok Madu Ali” orang akan tertanya – tanya “Keropok apa?”, “Apa madu?”. Begitulah.

Namun dengan kehadiran laman web tuan puan di internet, dan dengan kepakaran kami membantu menaikkan kata kunci dan nama bisnes atau produk anda situasi di atas sangat mudah di atasi. Bakal pelanggan anda apabila mencari sesuatu di internet, contohnya mereka mencari perkataan “Keropok Sedap”. Maka dengan pendekatan kami, kami akan usahakan supaya laman web tuan puanĀ berada di halaman pertama hasil carian perkataan tersebut. Ini memungkinkan bakal pelanggan tuan puanĀ yang berada di luar kawasan juga berminat untuk membeli produk tuan puan.

Dari itu kita menapak sedikit demi sedikit dan tidak mustahil untuk membawa bisnes tuan puanĀ ke peringkat antarabangsa. Tuan puan boleh bayangkan sendiri, dengan 24 jam satu hari laman web tuan puanĀ membantu bisnes tuan puan. Sedang tuan puanĀ tidur nyenyak ada bakal pelanggan dari Amerika Syarikat sedang membaca penerangan produk tuan puan. Mungkin mereka berminat, dan mereka berhubung dengan tuan puanĀ melalui laman web itu. Tuan puan bangun pada keesokan harinya, selesai solat Subuh boleh cek ada berapa banyak pesanan yang masuk.

Awal – awal pagi tuanĀ puan dah boleh keluar pergi ke pejabat pos dan pos produk jualan tuan puanĀ kepada pelanggan – pelanggan tuan puanĀ yang menunggu dengan tidak sabar sekali.

Bayangkan dari produk kecil – kecilan tuan puan yang mungkin dipasarkan di kedai – kedai runcit berdekatan dengan rumah tuan puan, kini boleh didapati dari seluruh dunia.

Insya’Allah, dengan kepakaran kami ini, kami tawarkan perkhidmatan kami untuk kembangkan bisnes tuan – tuan dan puan – puan.

Oh ya, bisnes kami masih baru. Tidak mencapai kadar minimum untuk mengenakan GST. Jadi setakat ini, semua harga adalah tiada GST.